Prepare Image
Resolutions of images:
- Image for Products
File format: .jpg/.png;
Size: (850x850)px; or all images are proportional;
Resolutions: 96-DPI;
JPG Compression: level (5-8). - Image for RWD Wrappings » SLIDER-BANNER
- effect: carousel; max-width: 100%
File format: .jpg/.png;
Size: width:1500px; height: any;
Resolutions: 96-DPI.
JPG Compression: level (5-8). - effect: carousel; Container-width: 1140px
File format: .jpg/.png;
Size: width:1140px; height: any;
Resolutions: 96-DPI.
JPG Compression: level (5-8).
- effect: carousel; max-width: 100%
Retouching of Product-Image Photo
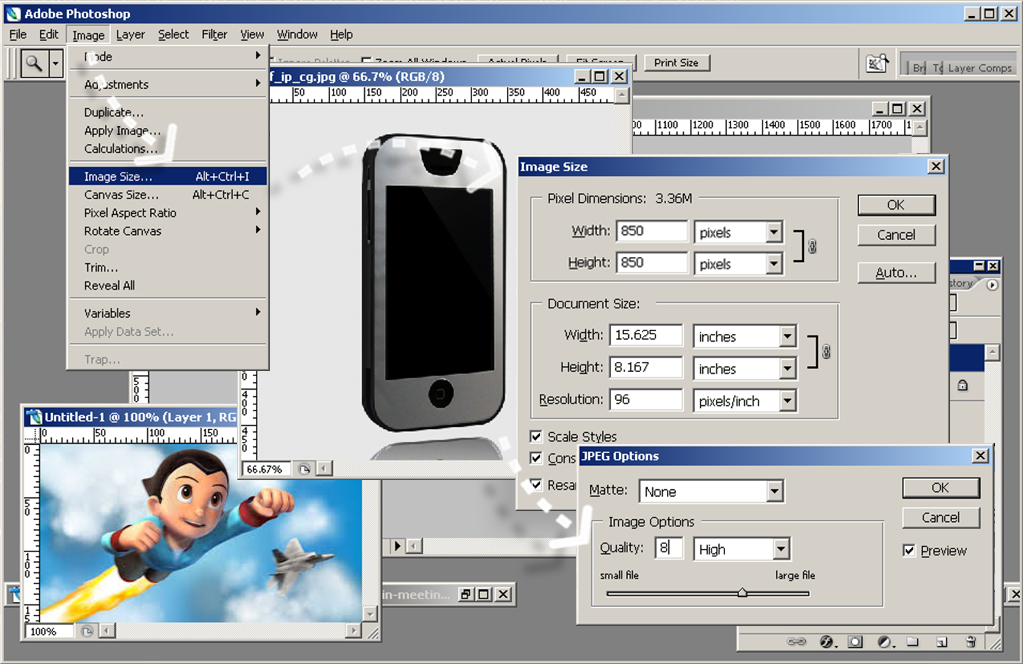
Resizing Product-Image:In order to achieve a consistent result, all images should be downsized to a square or make them in the same proportion, and (850x850)px is recommended.
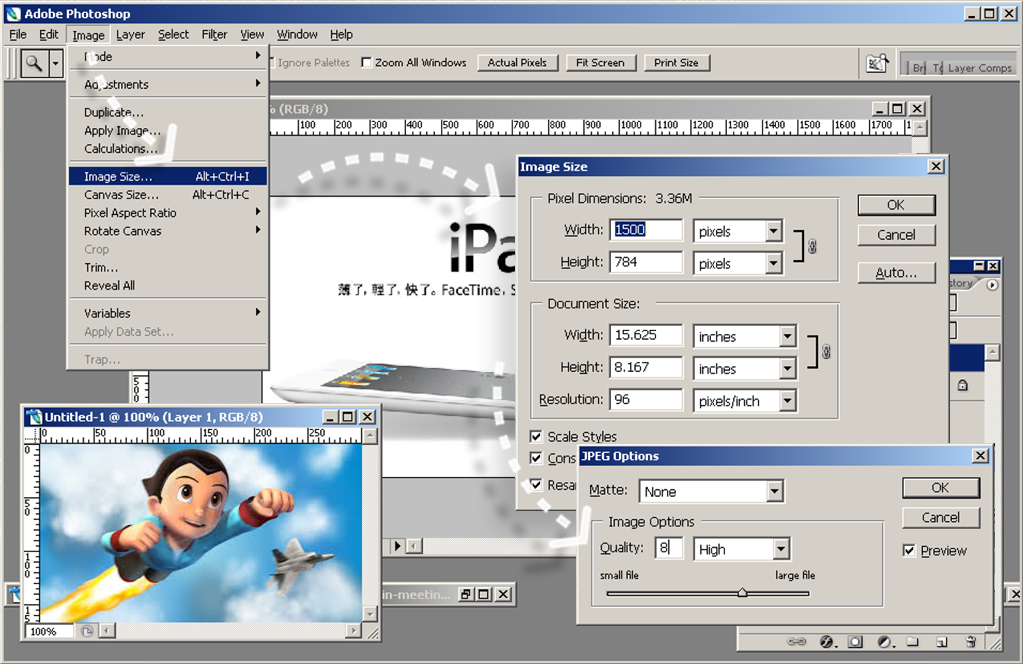
Make it at (850x850)px, you will always achieve the best result of Product Inner Zoom.Resizing an image is easy, open your Photoshop, select "Image" from the top toolbar, then pick the option "Image Size".
- Change the resolution to "96 pixels/inch";
- Change the width to "850 pixels" first, and the height will be changed automatically in a constrain proportion manner.
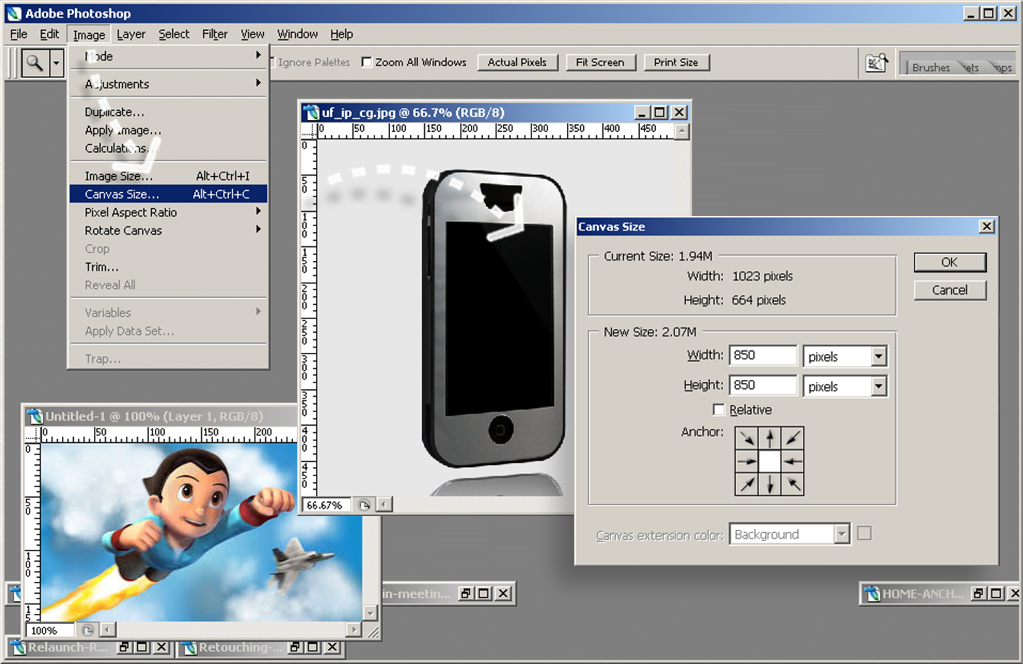
*To form a square, you can make use of the cropping function - "Image > Canvas Size" to reduce the height. - Click "OK".
If you're gonna save your image as JPG format, do remember to choose a quality compression not greater than "8". A higher quality compression will just weaken the downloading performance of the whole website.
Cropping Product-Image:
Open your Photoshop, select "Image" from the top toolbar, then pick the option "Canvas Size".
To form a square, just change its height to "850 pixels" and keep the width at "850 pixels".
Click "OK".
A best and quickest way to turn a background to white:
White Background + Rich Brightness
In order to make use of this nice feature of Photoshop, your photo should be taken on top of a white background, and rich brightness is vitally important or the product object will be overexposed after processing, as the higher degree of the grey background turns out the brighter of the object.
White Surrounding
Not just the background, especially for those objects that produced with the polished surface finishing, the reflection of surrounding elements will be absorbed to the polished surface. To let it glittering like it's real, a white surrounding is also important.
Nature of Digital Photos
Despite the white and brightness, the nature of the digital photos will be filled in a bit of light grey in the background.
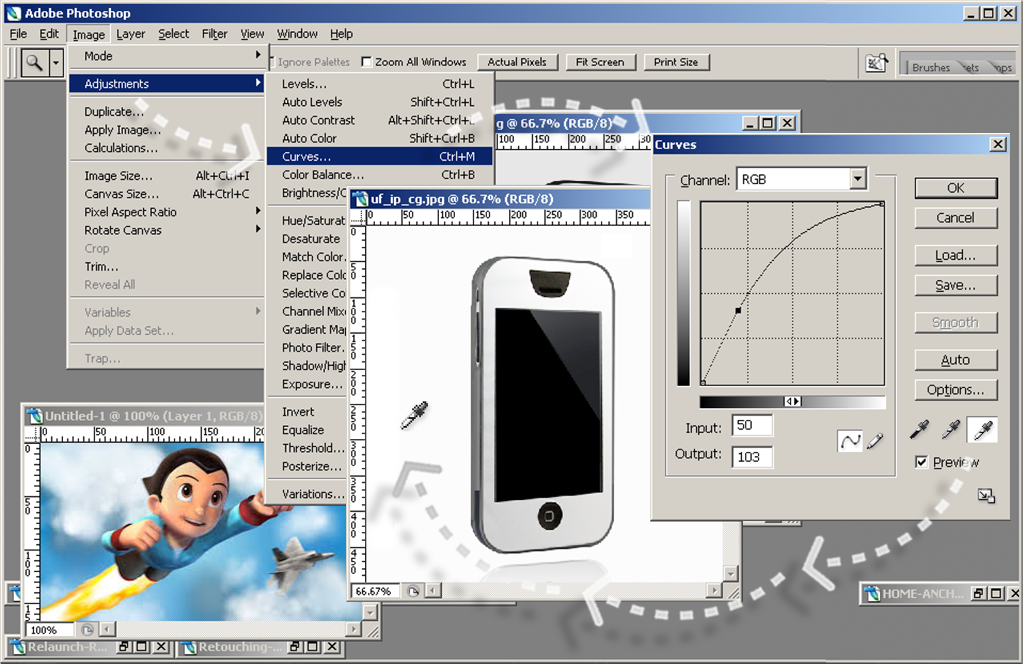
Remove the Grey from Background
Open your Photoshop and select "Image" from the top toolbar, then "Adjustments", then "Curves", you should pick the third dropper from the panel and use it to pick the light grey background of the photo.
Your Preparations
You had better take a few photos first instead of taking all of them, so that you will be able to test if your photos are good enough for processing.